Organisation and team profile
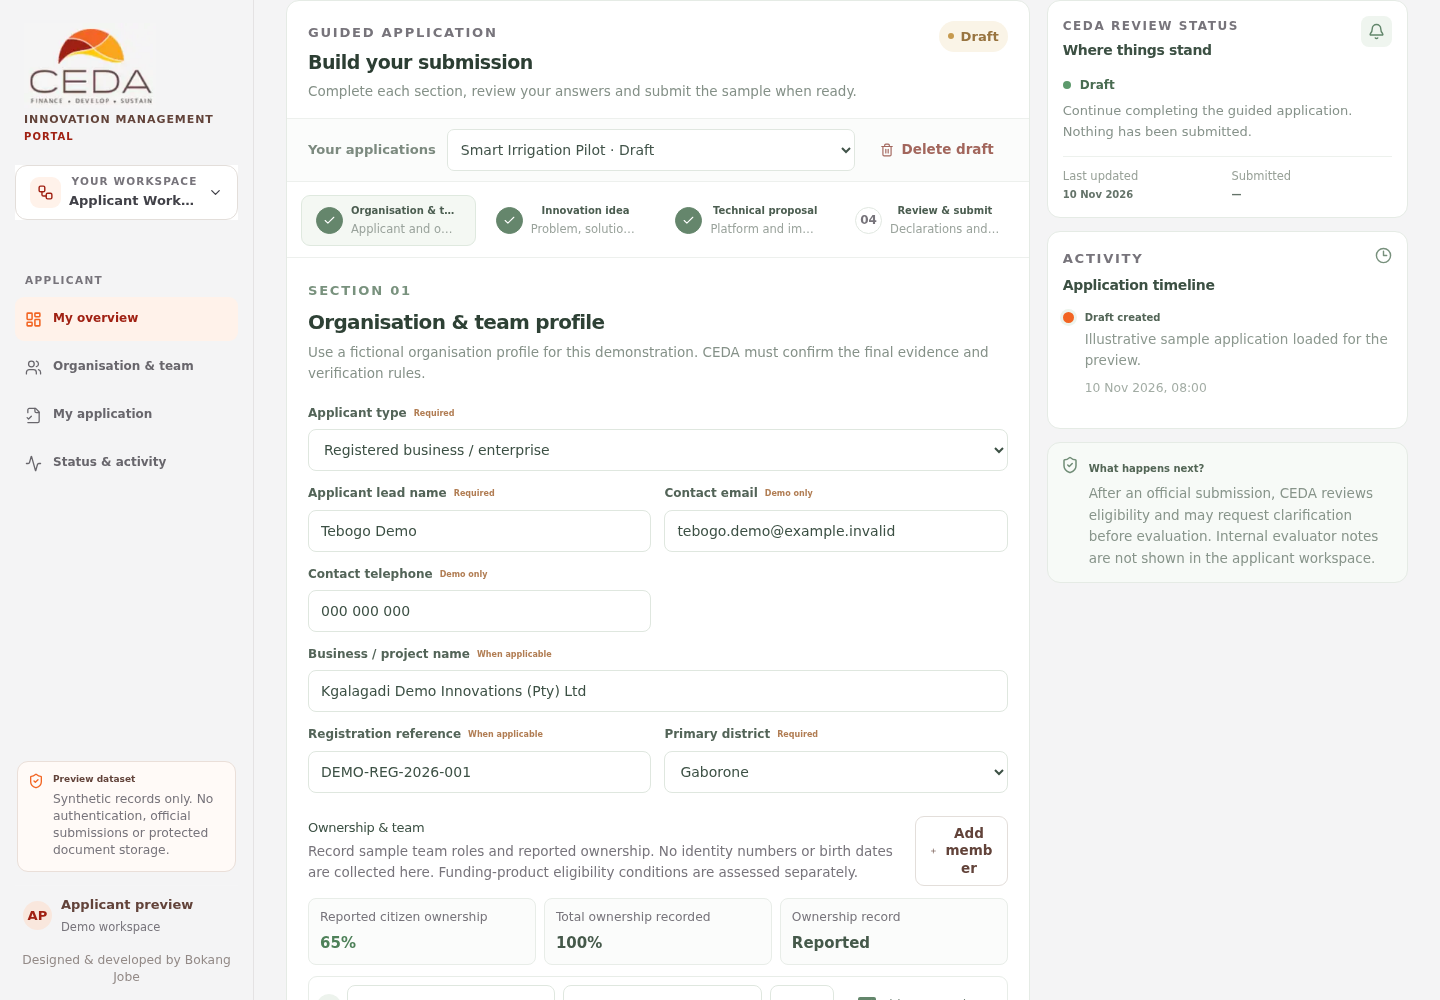
The first part of the Applicant journey describes who is applying and the organisation or project team associated with the innovation. Use invented details in the preview.
1. Open the profile section
- Open the Applicant workspace.
- In the guided application stepper, select Organisation & team profile. In a published form, the equivalent section uses the title configured by Operations.
- Confirm that the application status is Draft. Submitted versions are protected against direct editing.
2. Complete the applicant and organisation fields
The fallback profile shows the following applicant-type options. A published funding form can change the field names, order, options and required status.
| Field | What to enter in the preview |
|---|---|
| Applicant type | Choose Individual citizen entrepreneur, Registered business / enterprise, Co-operative, Joint venture / partnership, Existing business seeking expansion, New venture / start-up, or Micro-enterprise / group |
| Applicant lead name | Use a fictional name for the person leading the sample application |
| Contact email | Use a reserved demonstration address such as applicant@example.invalid |
| Contact telephone | Use an invented placeholder number |
| Business / project name | Enter a fictional organisation or project name where applicable |
| Registration reference | Use a made-up reference such as DEMO-REG-001 |
| Primary district | Choose a district from the list |
Read any help text displayed beside configured form questions. It is the published form's instruction to the applicant. A configured version may use a different field label, including a registration or identity reference appropriate to the applicant type.
3. Add and maintain team members
- Review the Ownership & team panel.
- Check the sample team rows. Each row has a name, role, ownership percentage and a Citizen-owned indicator.
- Select Add member to open the entry fields.
- Enter a fictional sample name, role and ownership share between 0 and 100.
- Choose whether the sample share is marked as citizen-owned.
- Select Add to demo profile.
- Use the remove control on a row to delete a sample member. Confirm the prompt.
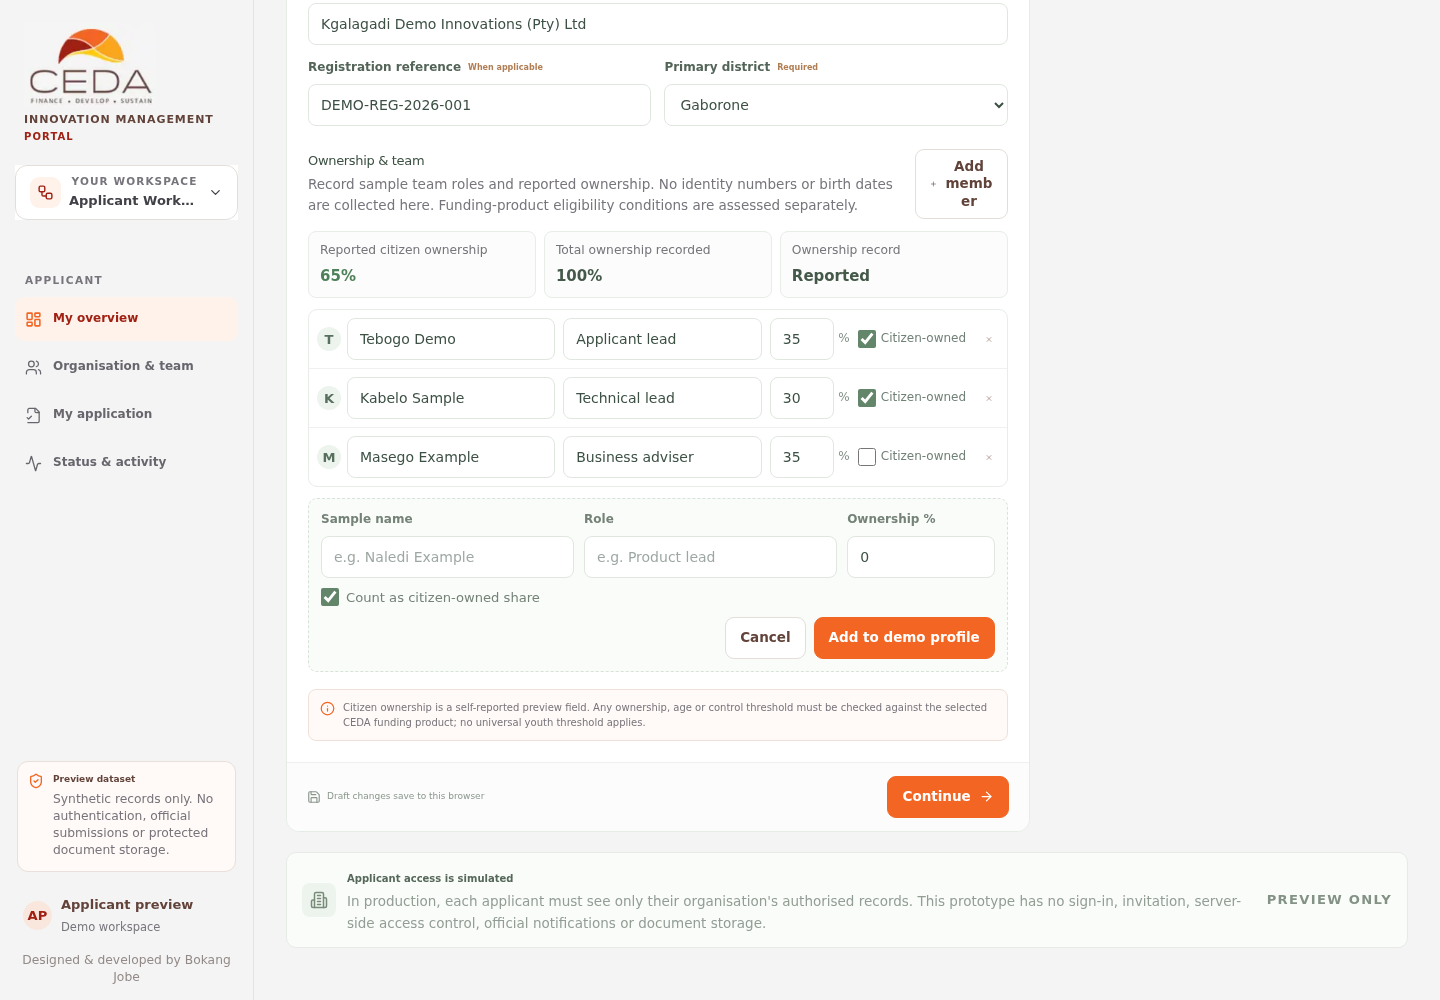
The ownership summary shows reported citizen ownership, total ownership recorded and whether the total has exceeded 100%. If the total is above 100%, correct the sample shares before continuing.
4. Interpret ownership information carefully
The ownership figures are self-reported demonstration values. A Citizen-owned checkbox does not verify citizenship, beneficial ownership, control, age or eligibility for a funding product. Do not treat the displayed percentage as an official eligibility decision.
CEDA's approved product-specific eligibility requirements and verification evidence must govern any real application. The prototype deliberately does not apply a universal youth or citizen-ownership threshold.
5. Continue to the innovation section
- Review the profile and team information for obvious omissions.
- Confirm that the total recorded ownership does not exceed 100%.
- Select Continue to open the next section.
- Return to this section later using the stepper if a sample detail needs correction.
Profile edits are stored only in this browser's preview record.