Applicant workspace overview
The Applicant workspace is the applicant-facing part of the CEDA Innovation Management Portal. It demonstrates how a person or enterprise can describe an innovation, prepare a funding request and follow the progress shown to the applicant.
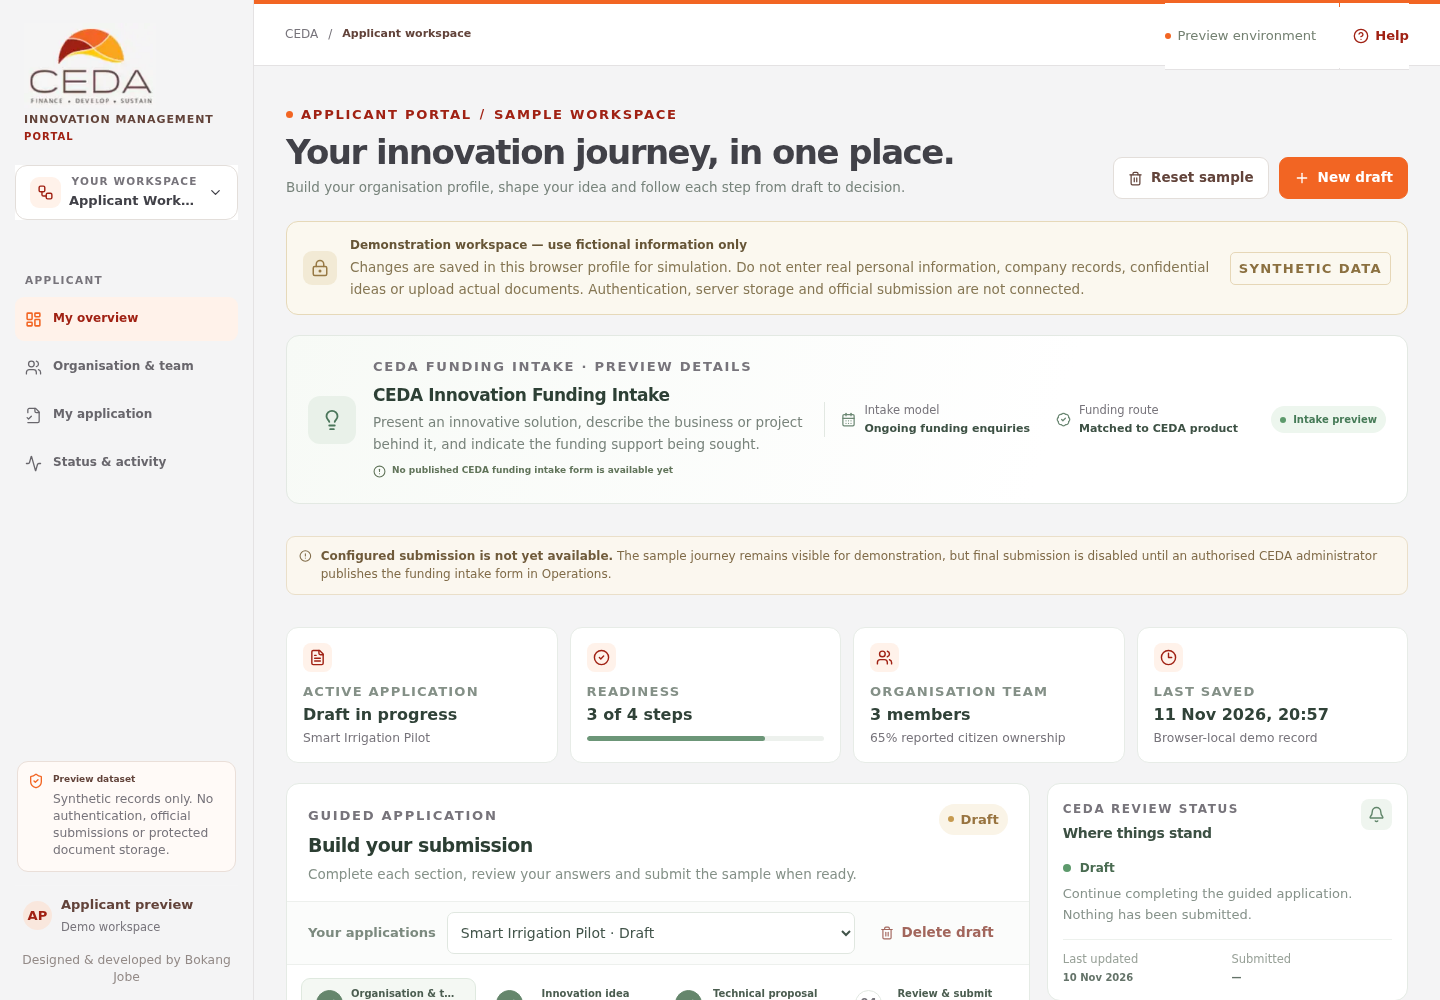
This workspace is a functional prototype. Drafts and profile information are saved in the current browser profile. It does not provide a live applicant account, official receipt, CEDA-controlled document storage or a real submission channel. Do not enter real personal information, real business records, confidential innovation details or actual supporting documents.
The clean preview currently has no published CEDA funding-intake form. It still displays a fallback sample journey and a draft so the interface can be explored, but the final sample-submission action is disabled until a form version is published in Operations in the same browser profile. If you are using a browser profile where a preview version has already been published, the intake card and guided sections may show that version instead.
1. Open the Applicant workspace
- Open the CEDA preview.
- Use the workspace selector in the left sidebar.
- Choose Applicant workspace.
- Confirm that the page identifies itself as the Preview environment and Sample workspace.
- Select Help in the top bar to open this Applicant guide in a new tab.
The direct preview route is /ceda/applicant. The first screenshot shows the clean preview and the current no-form-published message.
2. Understand the overview
| Area | What it shows |
|---|---|
| Page header | Applicant portal label, introduction, Reset sample and New draft actions |
| Funding intake card | The funding intake name, intake model, funding-route description and published-form version when available |
| Application summary | Active application, completed readiness steps, organisation/team summary and last-saved time |
| Guided application | Application selector, form sections, supporting-document step where configured, and the readiness stepper |
| Status and activity | Current applicant-facing stage, preview reference where available, clarification response area, funding offer/progress card when applicable and application timeline |
The sections displayed in the guided application depend on the form version published by the CEDA Operations workspace. A published form can define its own section titles, questions, required fields, choice options, repeatable tables and conditional questions.
3. Check the funding form before starting
- Read the funding intake card.
- Look for the published-form version.
- If the card says No published CEDA funding intake form is available yet, the sample journey can still be explored, but final submission is disabled.
- When a form is published, check its version number. A new draft is pinned to the form version available when that draft is created.
- Complete the sections shown in the stepper. A supporting-documents step appears when the published form contains document requirements.
A later form publication does not silently replace the version already pinned to an existing draft. See Build and publish a funding enquiry form for the Operations setup steps.
4. Create and select a draft
- Select New draft in the page header.
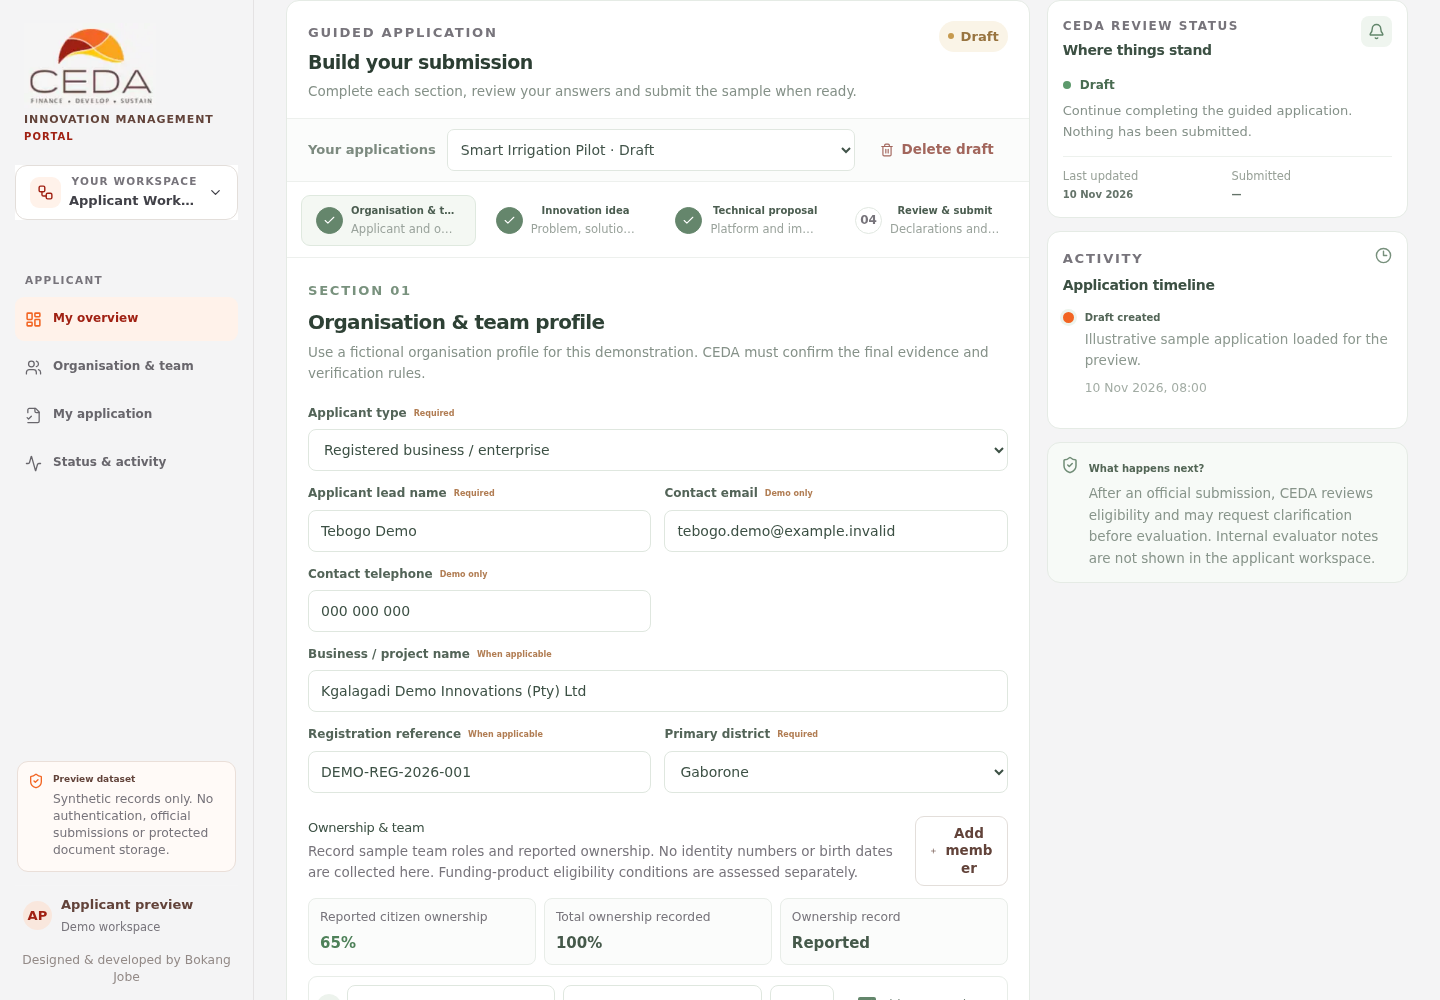
- The workspace creates a new synthetic draft and selects it in Your applications.
- Use the application selector to switch between the sample drafts in this browser.
- Complete the sections using fictional information.
- To remove an unfinished draft, select Delete draft beside the application selector and confirm the action.
The workspace screenshot below shows the application selector, current draft status and section stepper. The same controls remain available when a published form supplies different section names.
The preview blocks a second final submission for the same sample organisation and funding intake. This is a demonstration rule, not a statement of CEDA policy.
5. Follow the readiness stepper
- Select each section in the stepper.
- Complete the questions marked Required.
- Use Continue to move forward and Back to return to the previous section.
- Watch the readiness count in the summary cards.
- Resolve missing required answers and document requirements before opening the final confirmation.
The example below is a published-form test state. It shows the readiness panel after the configured sections, document requirements and declarations have been completed. A clean profile without a published form will not show this completed state.
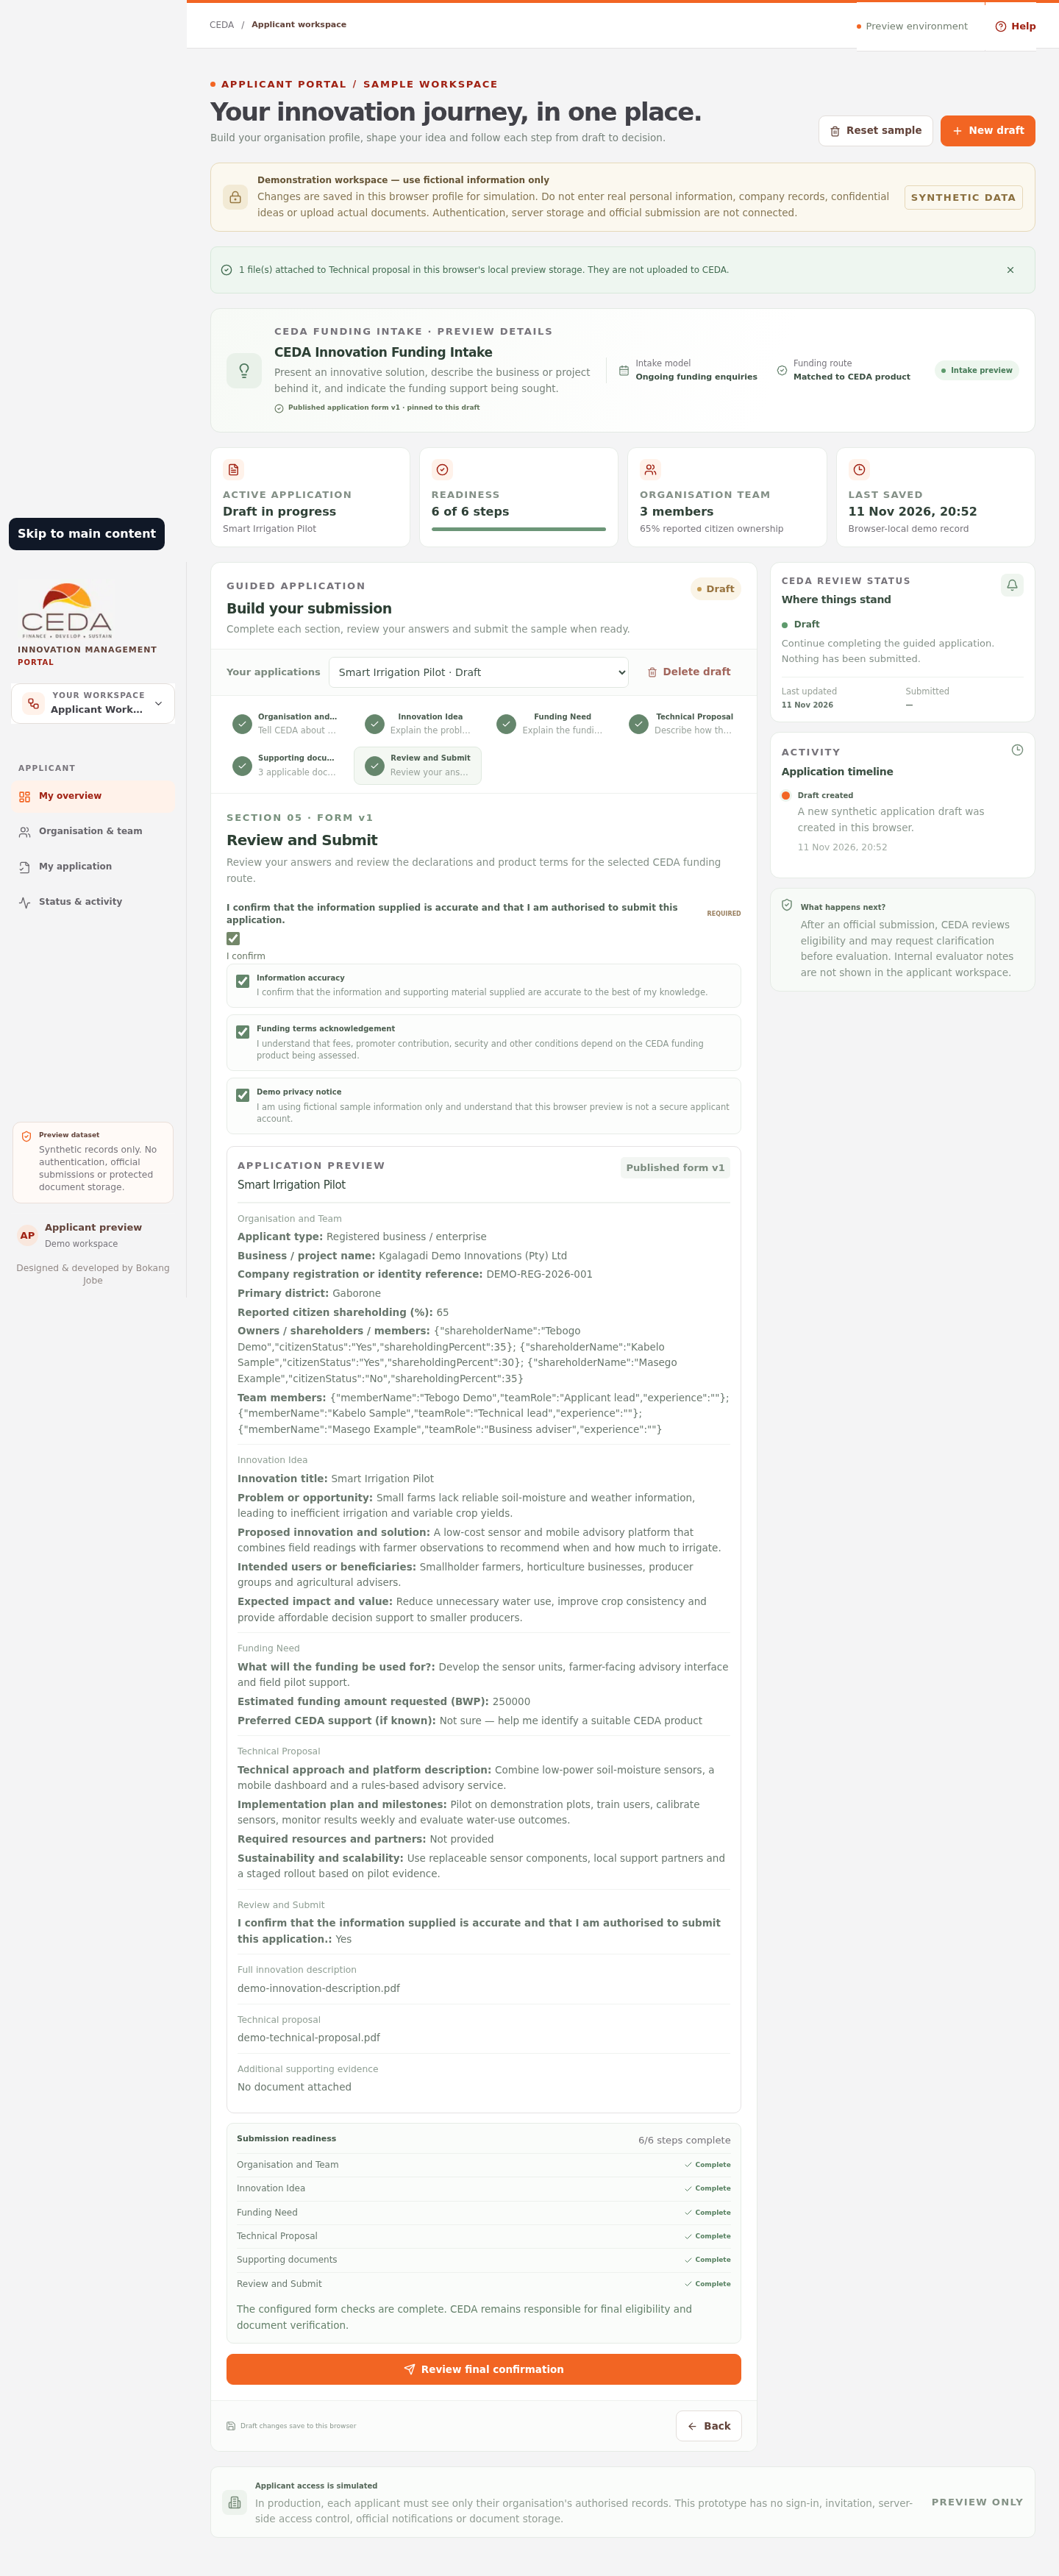
The clean fallback example uses organisation/team, innovation, technical proposal and review sections. A published form can have additional sections and an inserted supporting-documents step.
6. Save and reset sample data
Draft changes are saved to the browser's local storage. The Last saved card and editor footer identify this as a browser-local record. It is not shared with another browser, device or applicant.
Reset sample restores the synthetic starting data for this browser and removes the related preview attachments and review records. Treat reset as destructive for the local demonstration.