Build and publish a funding enquiry form
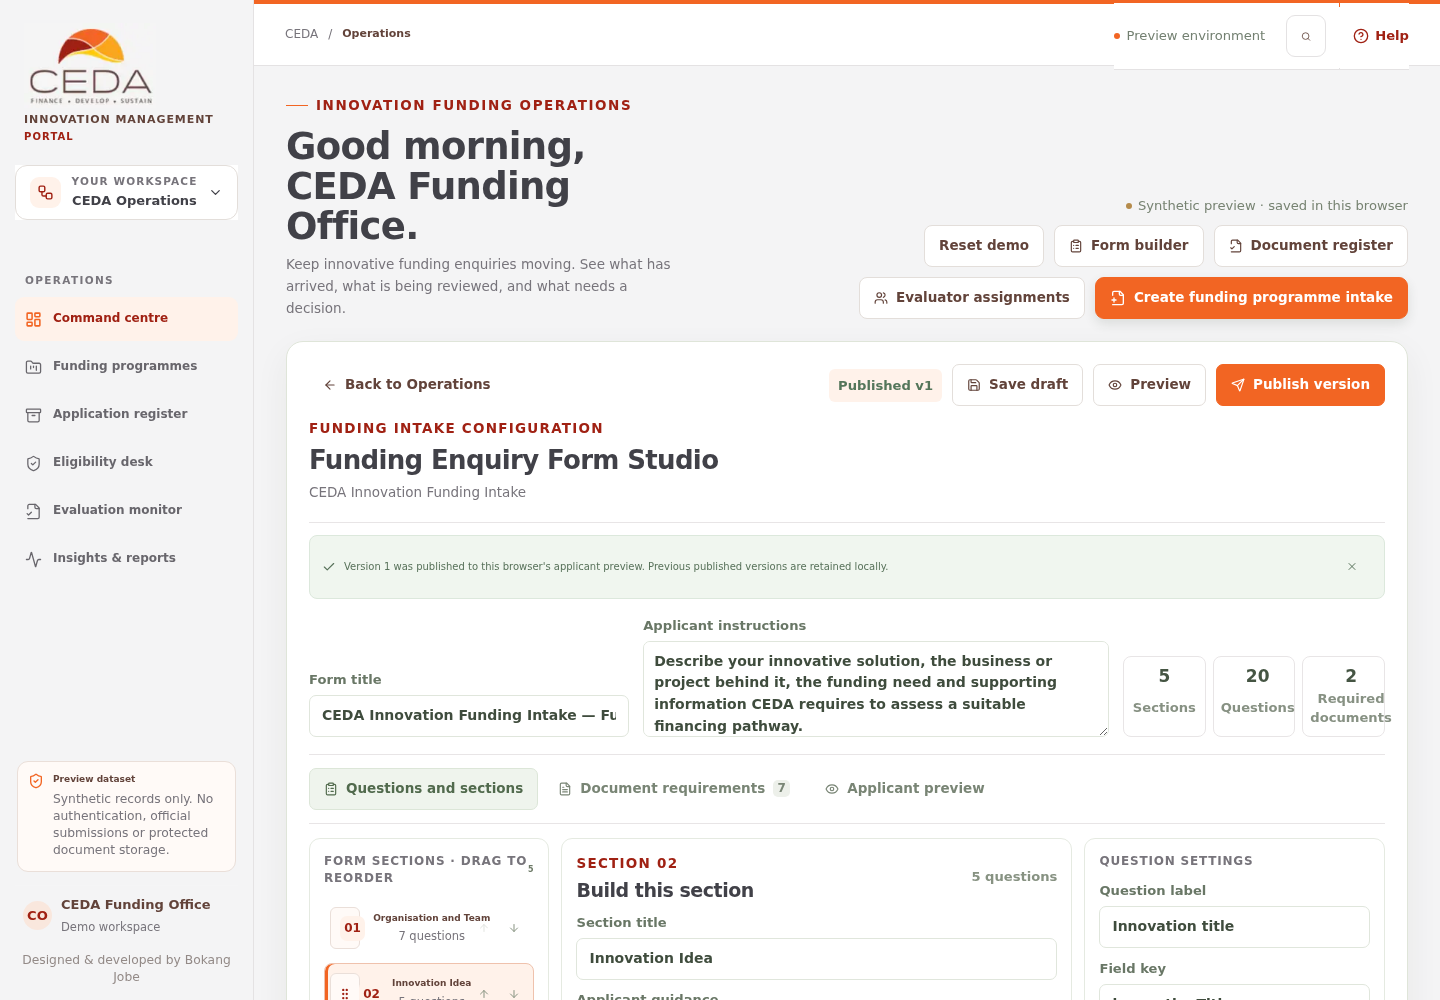
The Funding Enquiry Form Studio lets Operations configure applicant questions, section order and supporting-document requirements for a selected funding intake. A published preview version is read by the Applicant workspace in the same browser profile and portal origin.
Open the Operations preview and select Form builder.
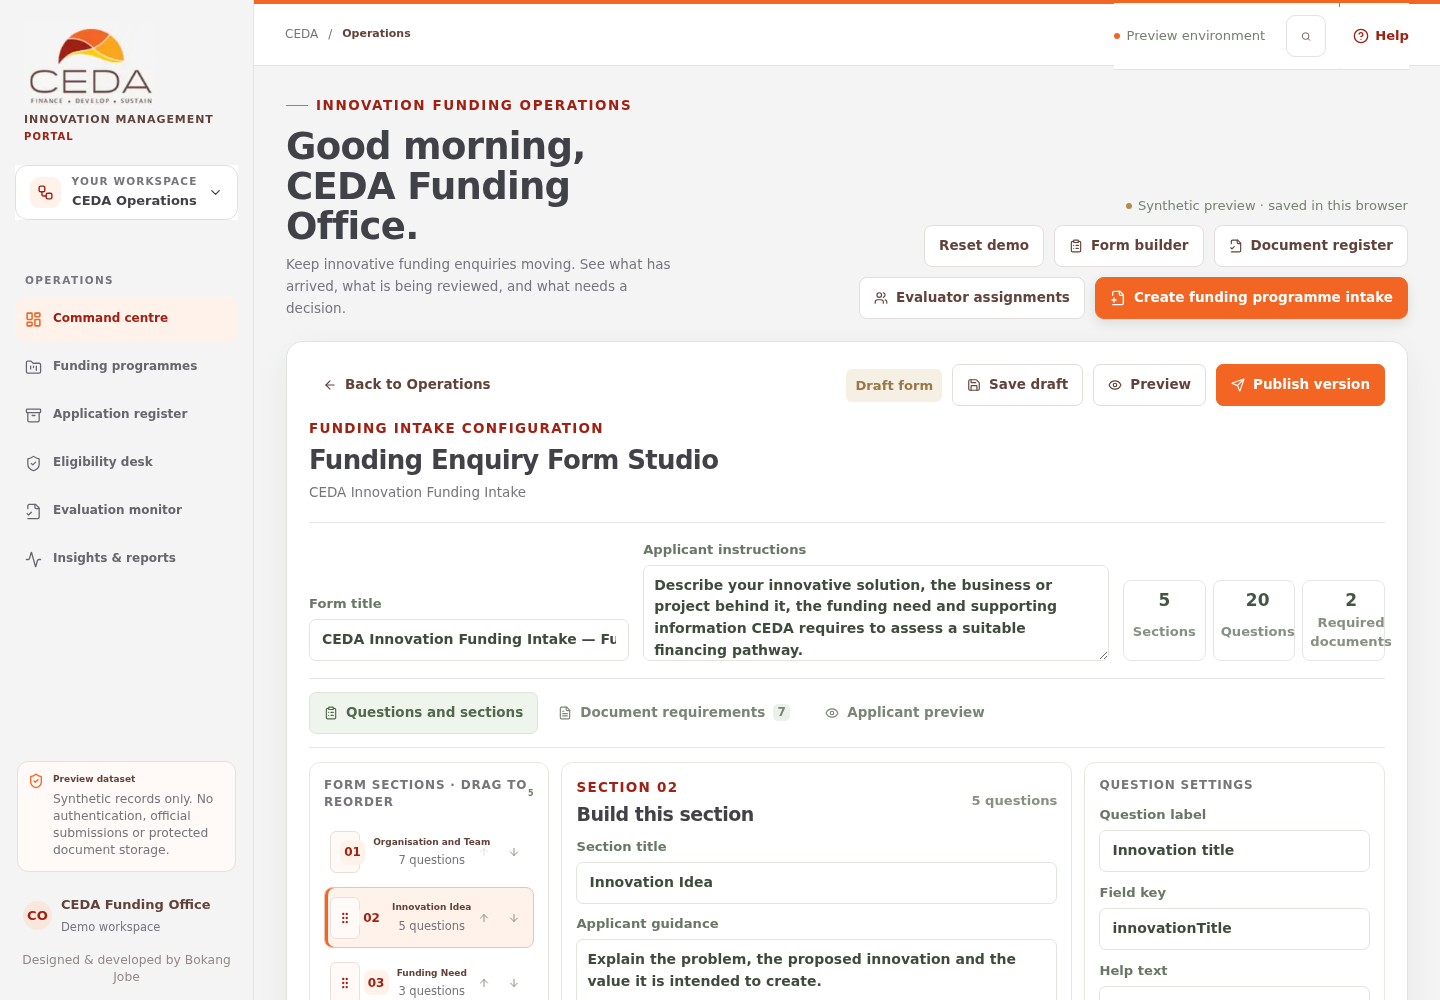
Form drafts and published versions are stored in this browser only. Publish version makes the form available to the Applicant preview in the same browser profile; it does not publish an official CEDA application form, activate a real funding opportunity, create a central configuration record or notify applicants. Use fictional form content and do not introduce unapproved eligibility thresholds or evidence rules.
1. Open the Form Studio
- Open the Operations workspace.
- Confirm the intended funding intake is selected.
- Select Form builder in the top action row.
- Confirm the heading Funding Enquiry Form Studio and the selected intake name.
- Use Back to Operations to return to the command centre.
The starter form contains five sections—Organisation and Team, Innovation Idea, Funding Need, Technical Proposal, and Review and Submit—with 20 questions and seven document requirements. Two starter document requirements are marked Required. These are prototype defaults, not approved CEDA requirements.
2. Edit the form title and applicant instructions
At the top of the builder:
- Edit Form title so it identifies the funding intake.
- Edit Applicant instructions to explain the purpose of the form and what the applicant should prepare.
- Review the section, question and required-document counters.
Use plain, task-focused instructions. Where applicants may not know which CEDA product is suitable, explain how to provide an estimate or select “Not sure” instead of inventing product limits.
3. Arrange sections and questions
The Questions and sections tab contains the section list, question canvas and Question settings inspector.
- Select a section in the left-hand list.
- Edit its Section title and Applicant guidance.
- Select a question in the canvas to edit it in Question settings.
- Use Add section to add a section. Use Delete selected section only when at least one other section remains.
- Reorder sections and questions using the drag handle. The adjacent up/down controls are a keyboard-friendly alternative.
- Remove an obsolete question with its delete control.
4. Configure questions
Select a question and edit its settings where applicable:
| Setting | Purpose |
|---|---|
| Question label | Wording displayed to the applicant |
| Field key | Stable data key used by the form definition; keep it clear and unique |
| Help text | Instructions or context shown with the question |
| Placeholder | Example or prompt inside the input |
| Required question | Whether an answer is required before submission |
| Maximum characters | Text, long-text and email length limit |
| Minimum / Maximum | Numeric bounds for number questions |
| Answer options | Choices for dropdown, single-choice and multiple-choice questions |
| Table columns | Columns shown in a repeatable table |
| Allow “Not applicable” | Whether an applicant may select that option for a supported question |
| Conditional visibility | Whether a question appears only after a specified answer to an earlier question |
The field palette includes Short answer, Long answer, Number, Date, Email address, Dropdown, Single choice, Yes/no checkbox, Multiple choice and Repeatable table.
For a repeatable table, define at least two columns. A conditional question must reference a question that exists and a value that is available in its answer options.
5. Configure supporting-document requirements
- Select Document requirements.
- Review the existing document list or select Add document requirement.
- Enter a Document name and applicant-facing Applicant instructions.
- Set Show for funding route when the requirement applies only to a particular answer to the funding-route question.
- Enter the Accepted extensions, separated by commas (for example, .pdf, .docx or .xlsx).
- Set Maximum size (MB) and Maximum files.
- Select Required document only when the item is mandatory for the relevant route.
- Remove any requirement that is not appropriate for the selected intake.
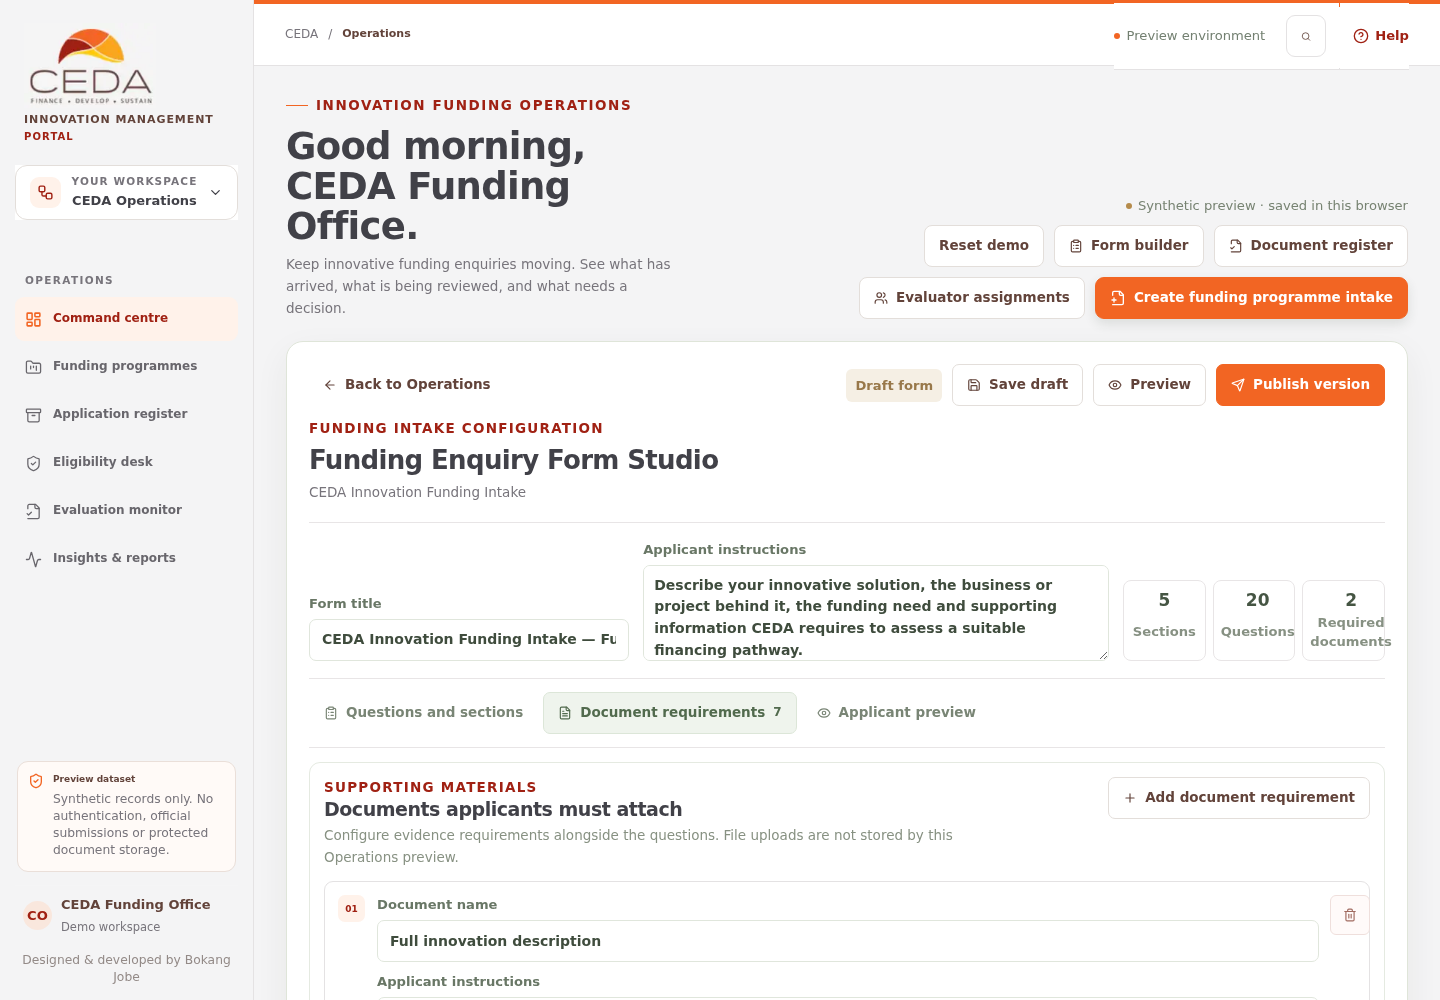
The Document requirements tab defines the rules shown to applicants; it does not upload or securely store files. CEDA must approve the actual evidence, formats, limits, retention and security arrangements before production use.
6. Preview the applicant experience
- Select Applicant preview.
- Enter fictional sample answers in the displayed fields.
- Add, edit or remove rows in repeatable tables.
- Change controlling answers to check conditional questions and document requirements.
- Check that section titles, guidance, required labels and supporting-document instructions are understandable.
- Return to Questions and sections or Document requirements to correct the form.
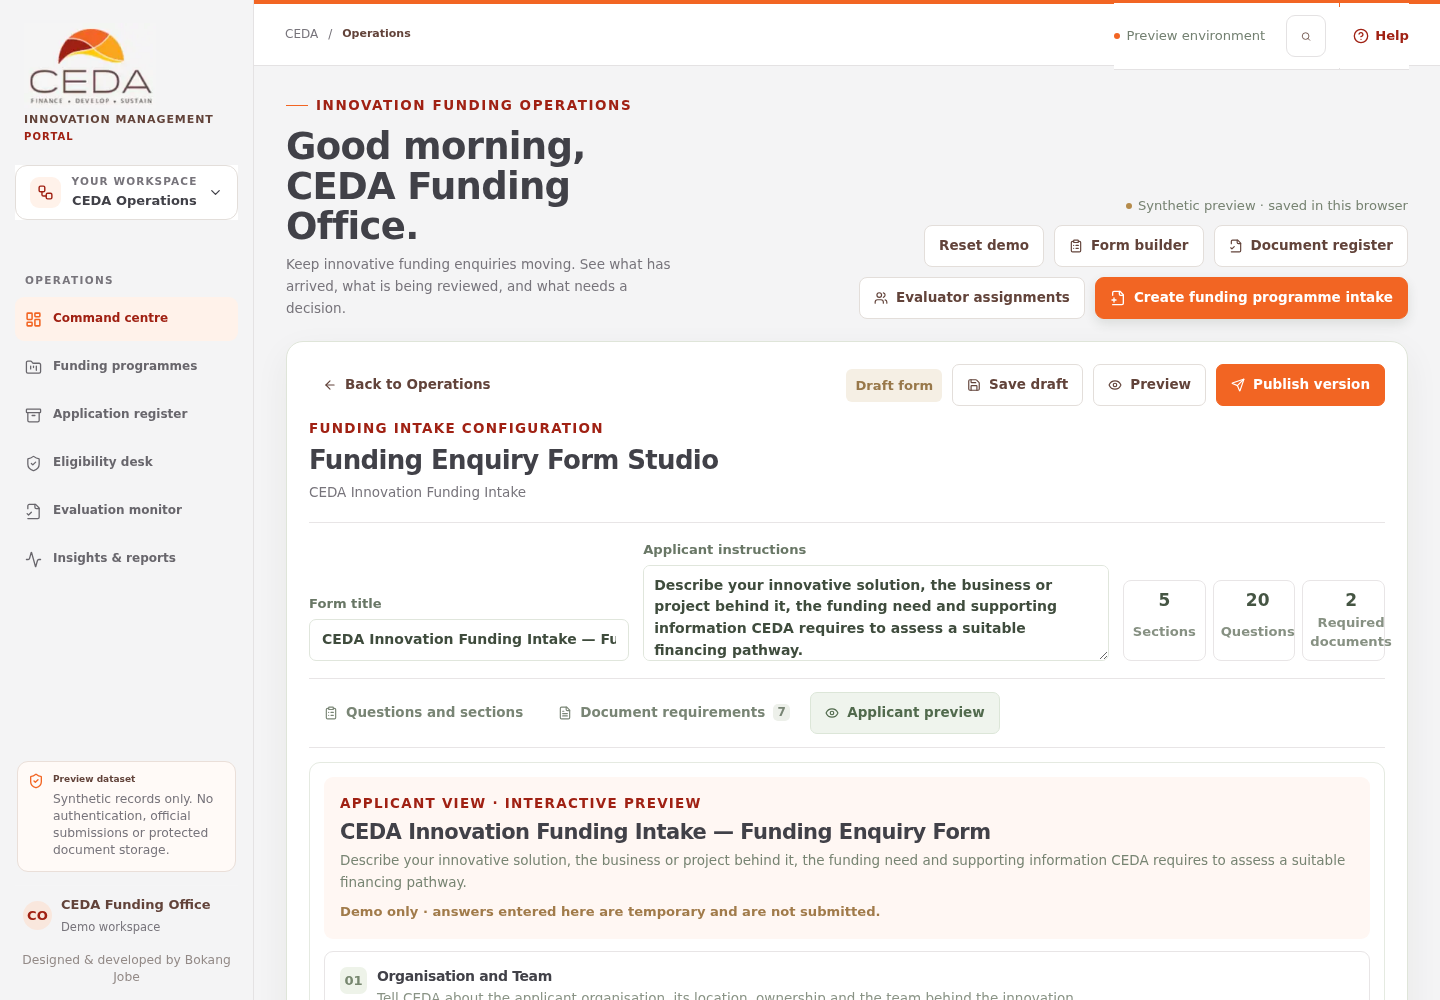
Answers entered in this tab are temporary form-preview values. They do not create an applicant record or submit an application.
7. Save a draft
Select Save draft in the Form Studio header. A confirmation message reports that the draft was saved in this browser for the selected funding intake.
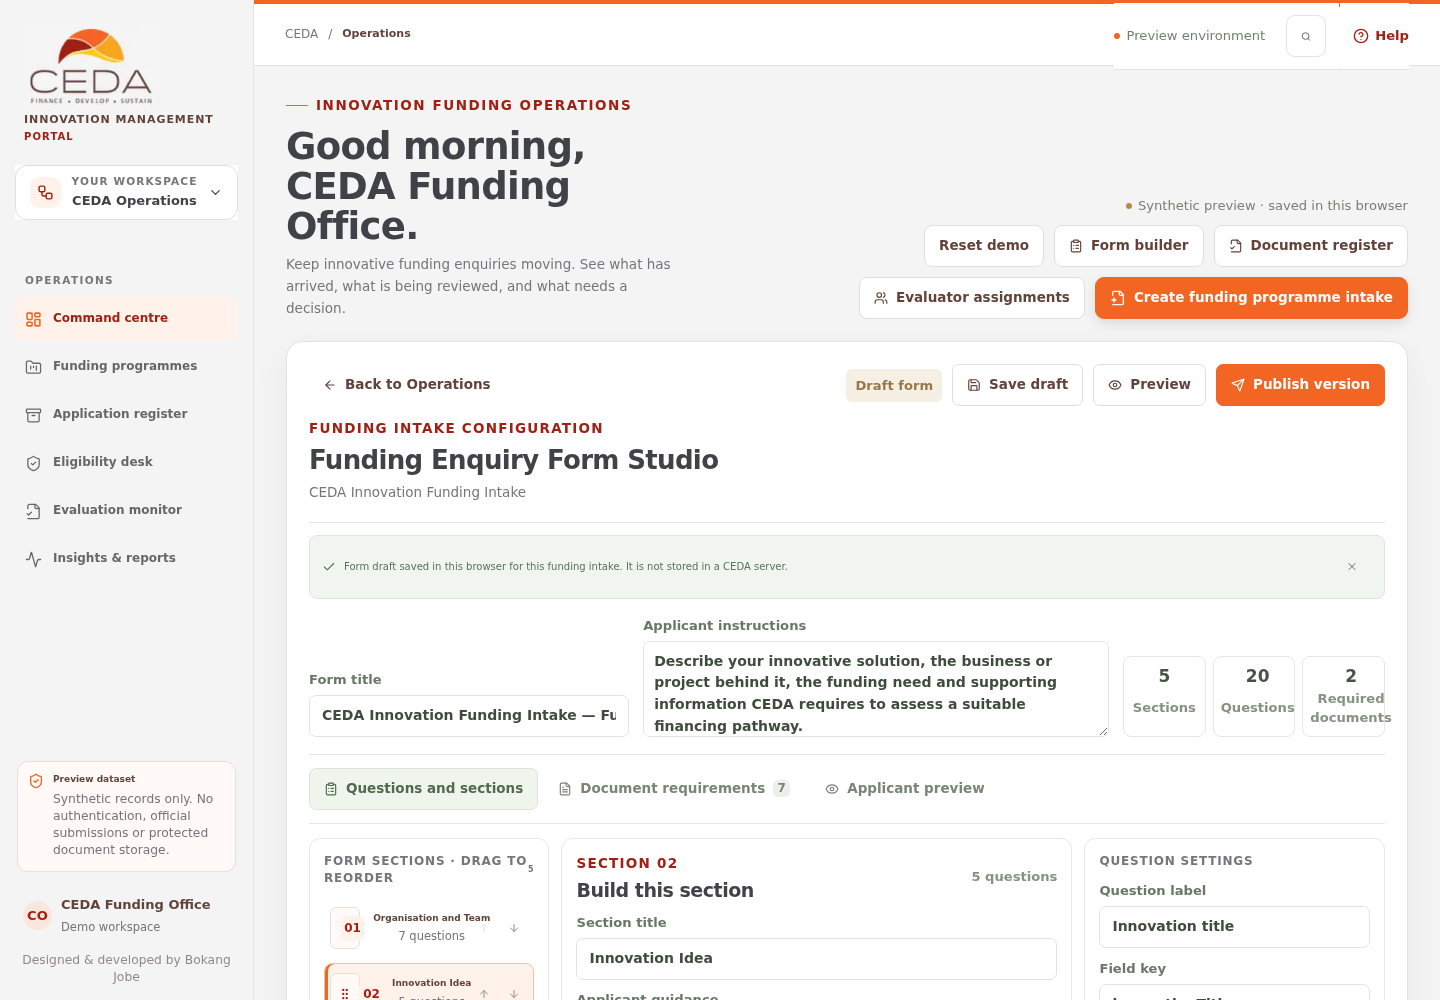
A draft is not visible as a published form to the Applicant workspace. Saving is a local browser action, not a central configuration update.
8. Validate and publish a preview version
Before publishing, resolve validation messages. Current checks include:
- a non-empty form title;
- at least one section and one question;
- a label and field key for each question;
- at least two options for choice questions;
- at least two columns for repeatable tables;
- valid references for conditional questions and document requirements; and
- a title, accepted extensions, positive size limit and positive file limit for each document requirement.
Then:
- Select Publish version.
- Confirm that the version badge increments and the notice reports the new published version.
- Open Applicant workspace in the same browser profile and refresh the page.
- Select New draft to create an applicant draft against the latest published version.
Each publication creates a new version snapshot. Earlier versions are retained in the local form registry; an applicant draft remains pinned to the version with which it began.
A clean browser may start with Draft form and no published version. The Applicant overview then indicates that no funding-intake form is available and disables final sample submission. Publishing a preview version removes that prototype-only blocker for tests in the same browser profile; it is not an official CEDA release.
9. Understand the implementation boundary
The Form Studio saves the draft and published definition in browser local storage. The Applicant renderer reads the published definition from the same browser origin. The preview does not provide a shared CEDA form service, central publication approval, immutable server audit or production submission connection.
Do not use real applicant details, confidential innovations, personal data or real evidence files. Production use requires CEDA-approved form content, identity, hosting, validation, audit, document storage and retention controls.